Ahhhh, okay- first of all. THANK YOU, THANK YOU, THANK YOU!!!! To all of you who read yesterday’s novel of a post & shared such extremely heart-warming comments- I am so touched. I was pretty frightened to post all of that personal information, but the response has literally brought tears to my eyes. I have an amazing group of readers & I am forever grateful to you all!! A lot of you have requested I share more personal posts, so I promise you- I will in the future!
But for today, I wanted to lighten the mood a bit cause my Birthday is almost here (Sunday!!). Getting older is scary, & yes it does give me anxiety, but I can’t say I still don’t get that childlike tinge of excitement when my B-day rolls around.
I am planning to have a mellow BBQ in the park with all of my favorite things: corn on the cob (obsessed), Rosé, and my friends + family. I have made only one request- presence over presents. There is really nothing I want other than a day of fun with the people I love the most. Although… gluten free cupcakes are always more than welcome (**hint hint** to the friends who are reading this).

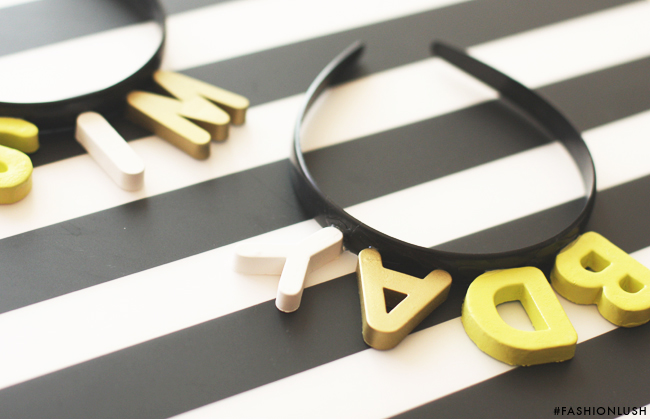
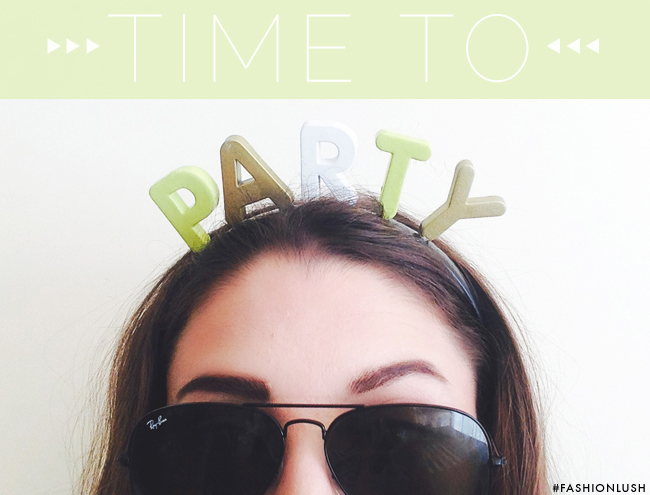
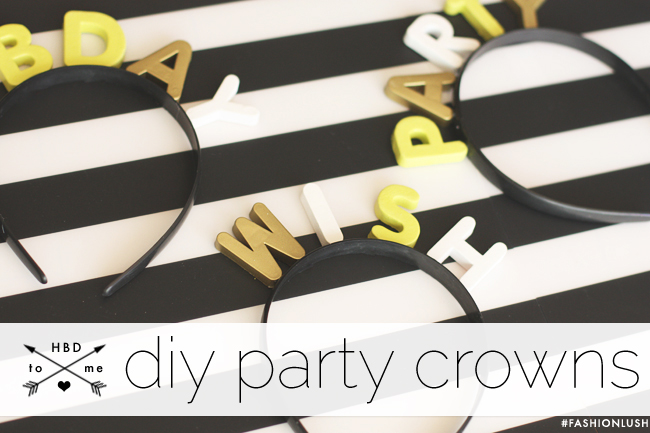
For the special occasion, I obviously needed a lil’ party favor, so I whipped up these uber cute DIY Birthday crowns.
Not gonna lie, I kinda totally made them for the sake of Instagram. These are gonna make for the PERF photo prop for my guests.
My only tip to you when making these is to NOT spray paint with a fresh mani (or wear some gloves). IDK what I was doing wrong, but somehow I finished with my hands covered in spray paint while my boyfriend, who so nicely helped me, got away without a drop on him. Apparently spray painting is not my forte.
Other than that one minor issue, these were super easy to make! I definitely plan to make these again, they would be so fun for one of the many upcoming Bachelorette parties I will be attending (in an R-rated version- naturally).
Enjoy & happy crafting loves!
xx, E
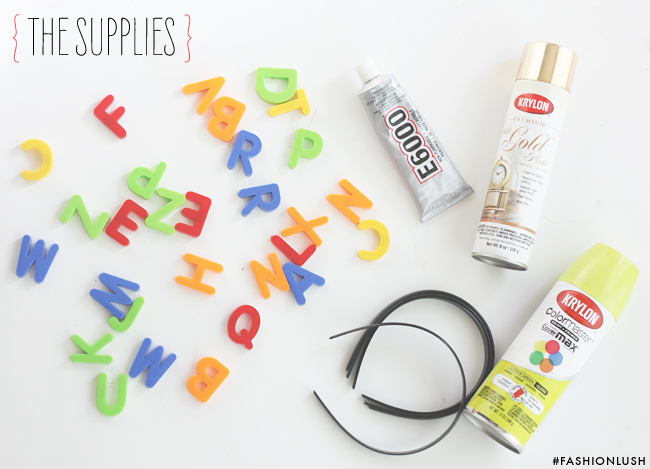
Supplies:
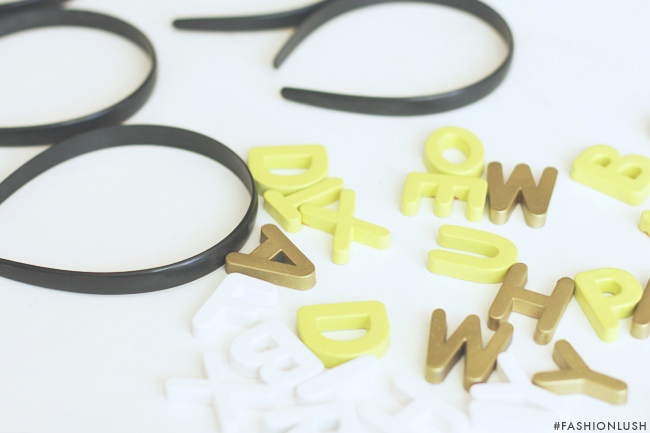
+ Spray paint in your choice of colors (I opted for white, gold, & lime green).
The Steps:
1. First, lay out the words you plan to use & snap a pic (so you don’t forget).
2. Divide up the letters depending on how many spray paint colors you are using. For me, it was three, so I placed every third letter in it’s own seperate pile.
3. Spray paint each group of letters one color, then the next group of letter the next color, & the last group of letters your last color. Make sense? This way your colors will alternate & not be next to e/o.
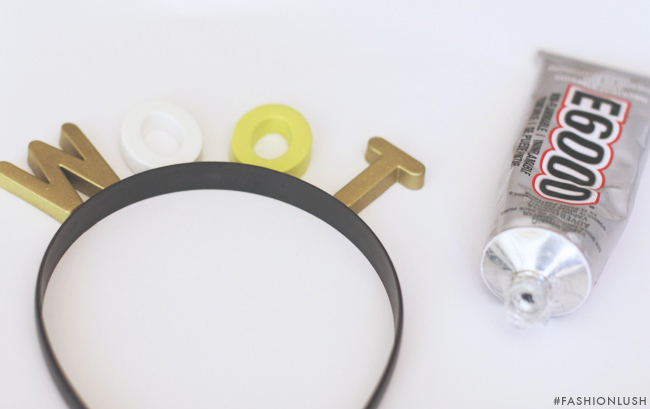
4. Let dry FULLY.
5. Rearrange your letter back into the original words you decided on (using your photo as a guide) & glue to your headband. Let the glue dry & you are good to go.
Easy peasy, right?