
Did you hear… it’s almost festival season?! Of course you did, it’s this time a year that all people can talk about is their festival circuit.
It’s too bad I am a Grandma & the whole thing sounds super exhausting/dusty/hot/sweaty, or else I think I would really love going all out on some festival looks.
I would 100% be that girl with braids in her hair, fringe everywhere, & most likely some crystals on my face. BUT- since that’s not gonna happen, be sure throw some extra flash tats on your bod for me & I will take a nice long nap in return for you. Deal?
To stay on top of your guys festival plans, cause I am always thinking about you babes, I whipped up one of my all time fave do it yourself projects.
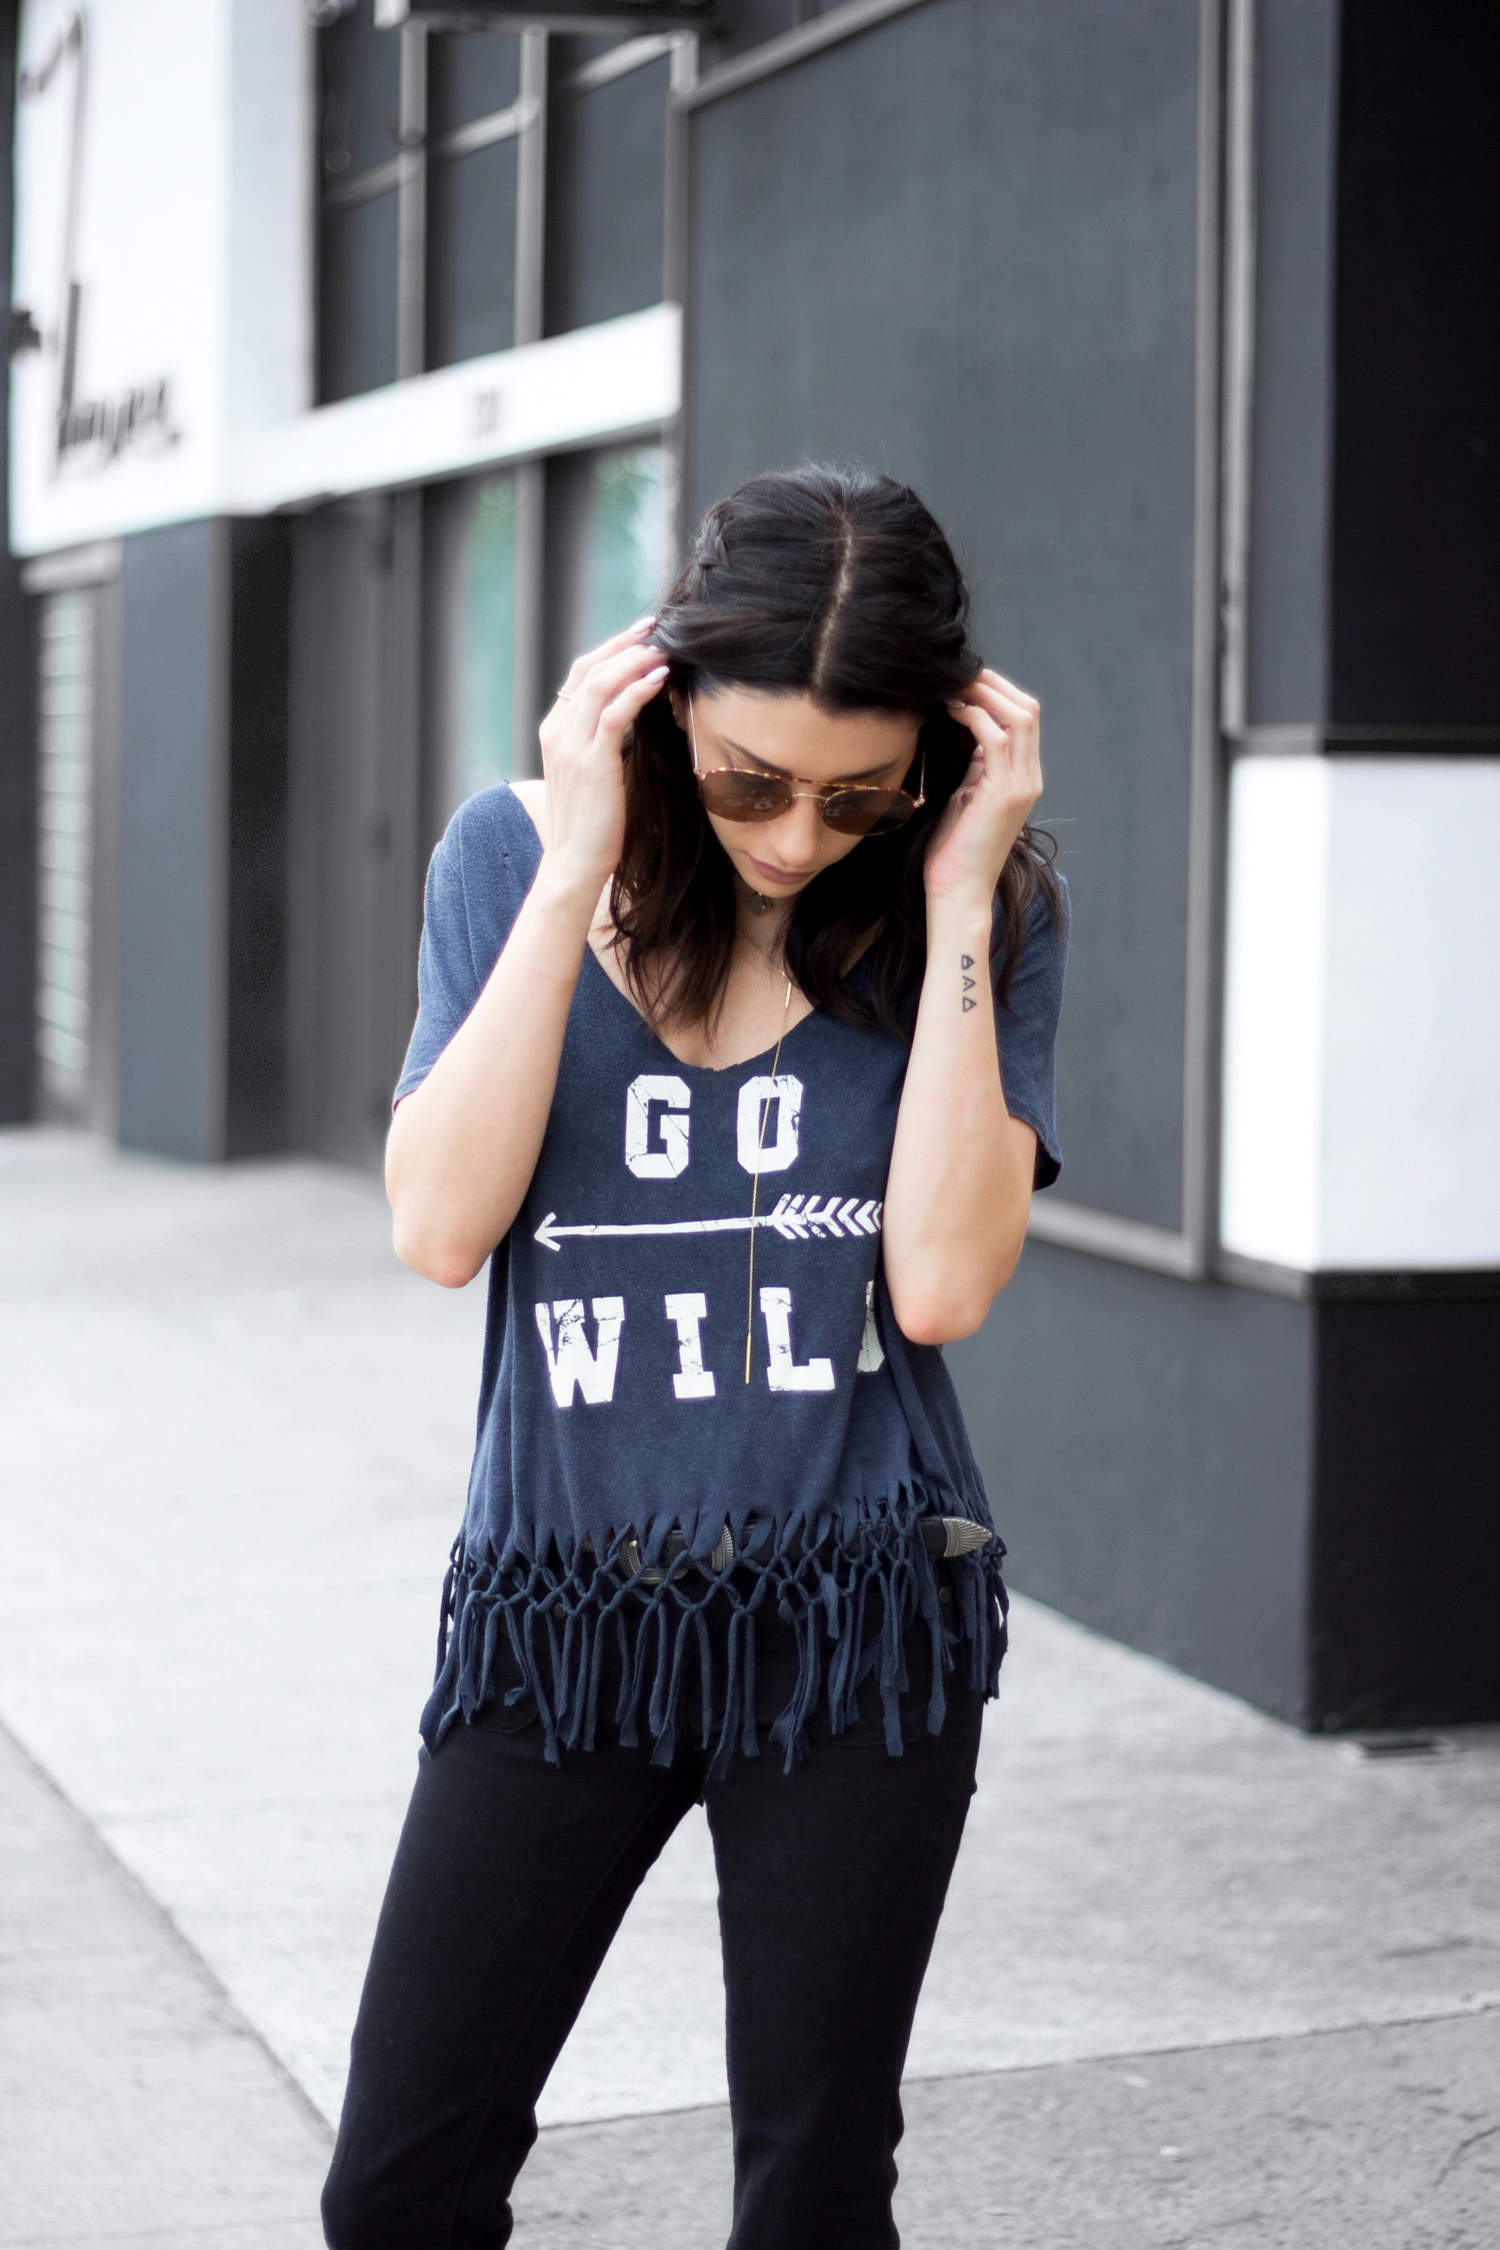
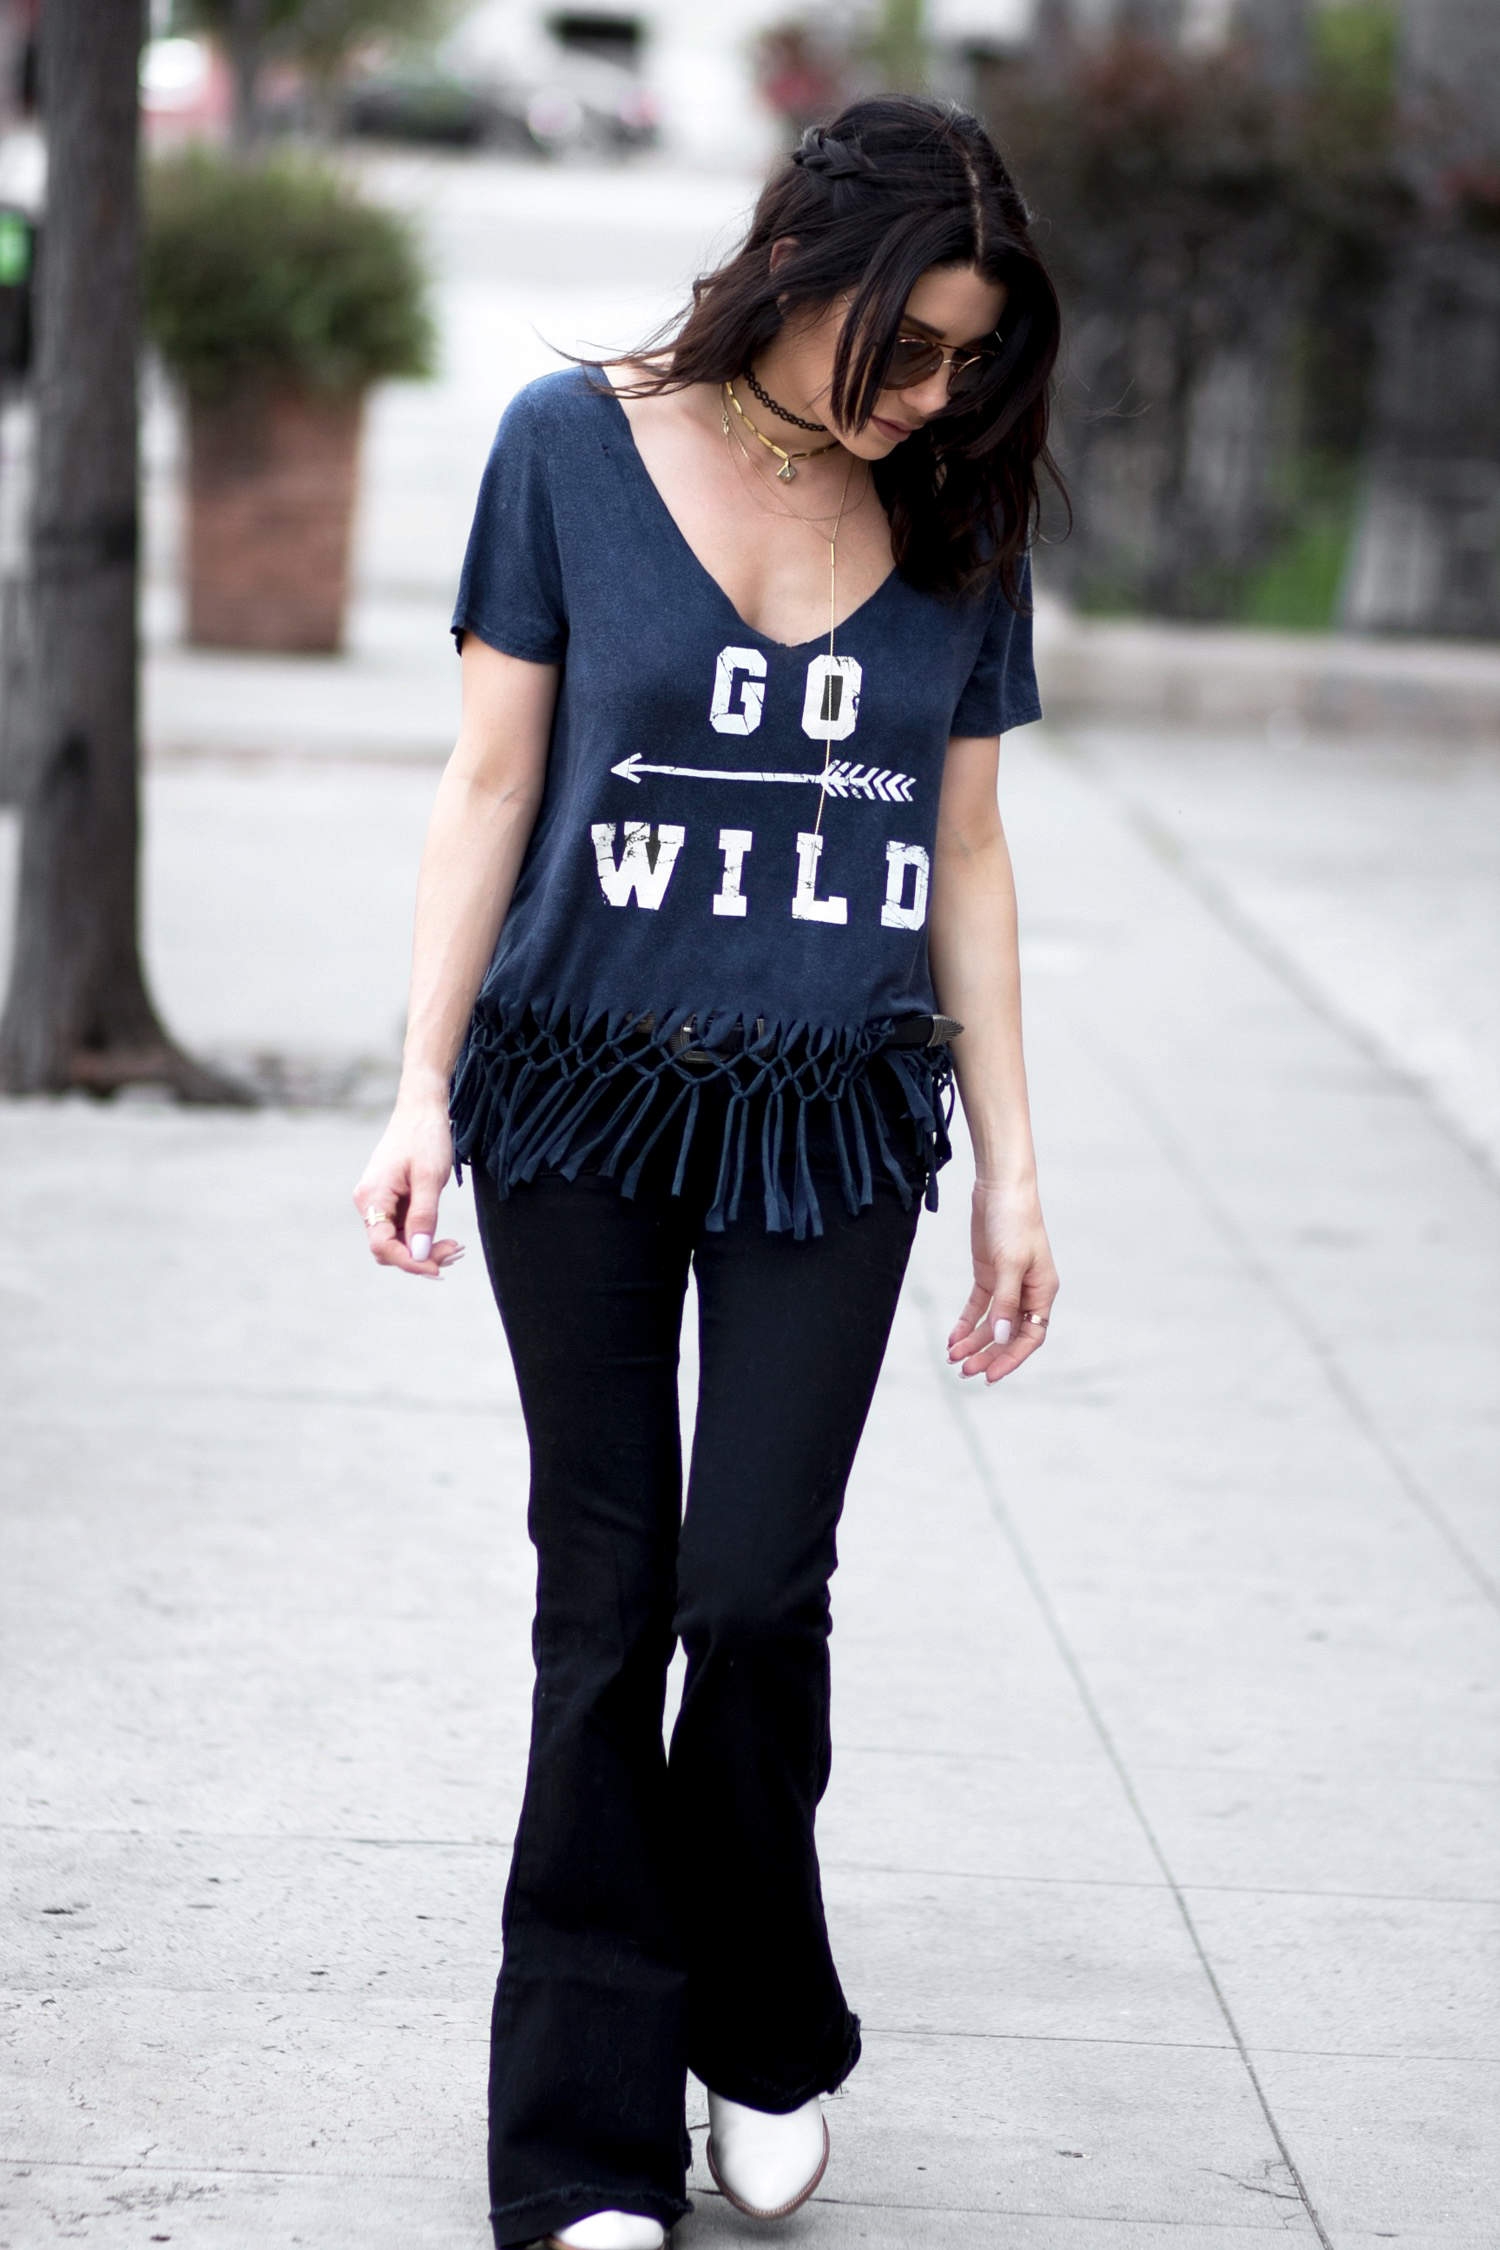
This DIY fringe t-shirt is perfectttt for your festival wardrobe. Throw it on over some shorts with (duh) braids & some rad slouchy boots or even Converse for a cool, comfortable, and festival friendly look!
Scope all the super simple how-to deets below & invite over your best festival friend for a crafty girls night before Coachella! x, E
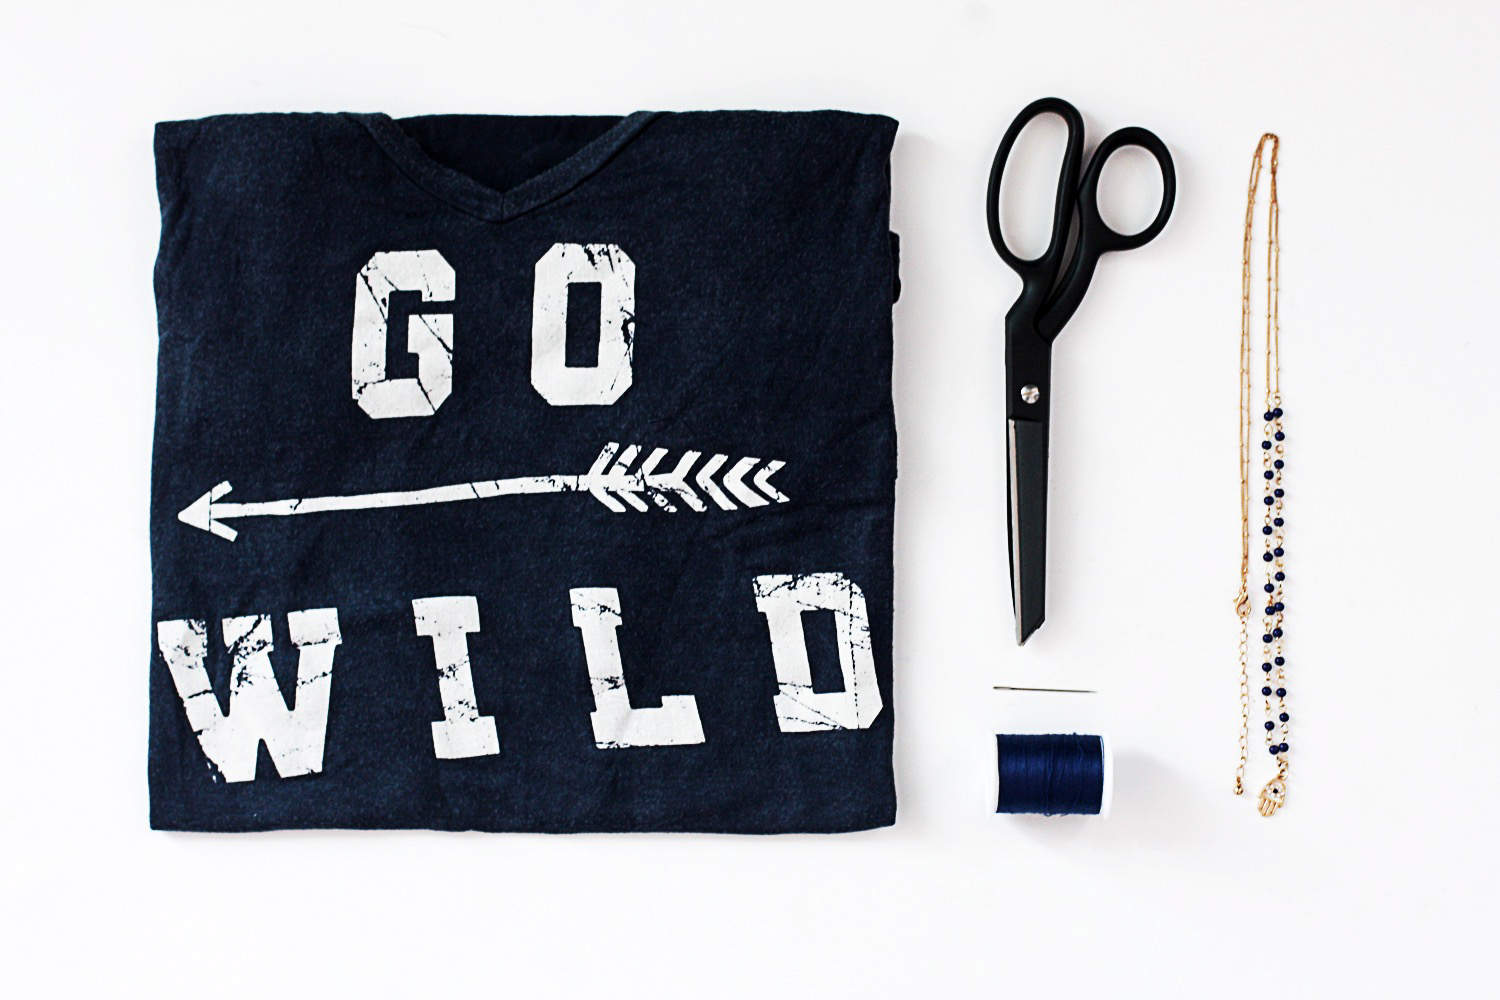
DIY Fringe T-Shirt
» necklaces (mind found here)
» fabric scissors
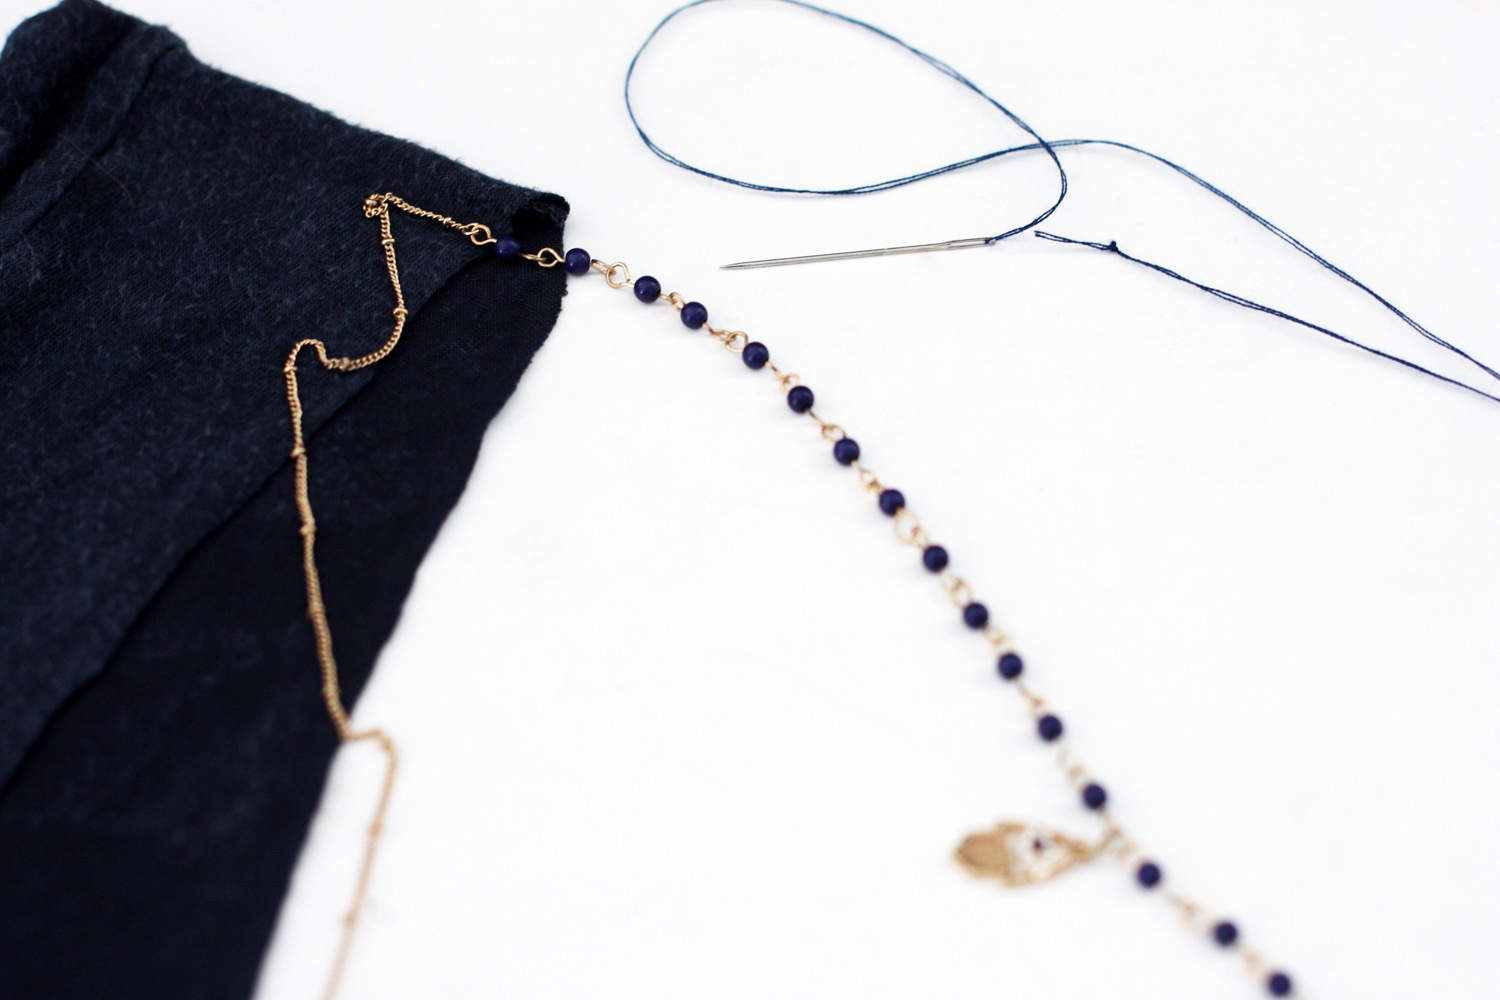
» needle & thread
1. Grab your fabric scissors & cut the hem off the bottom of the shirt.
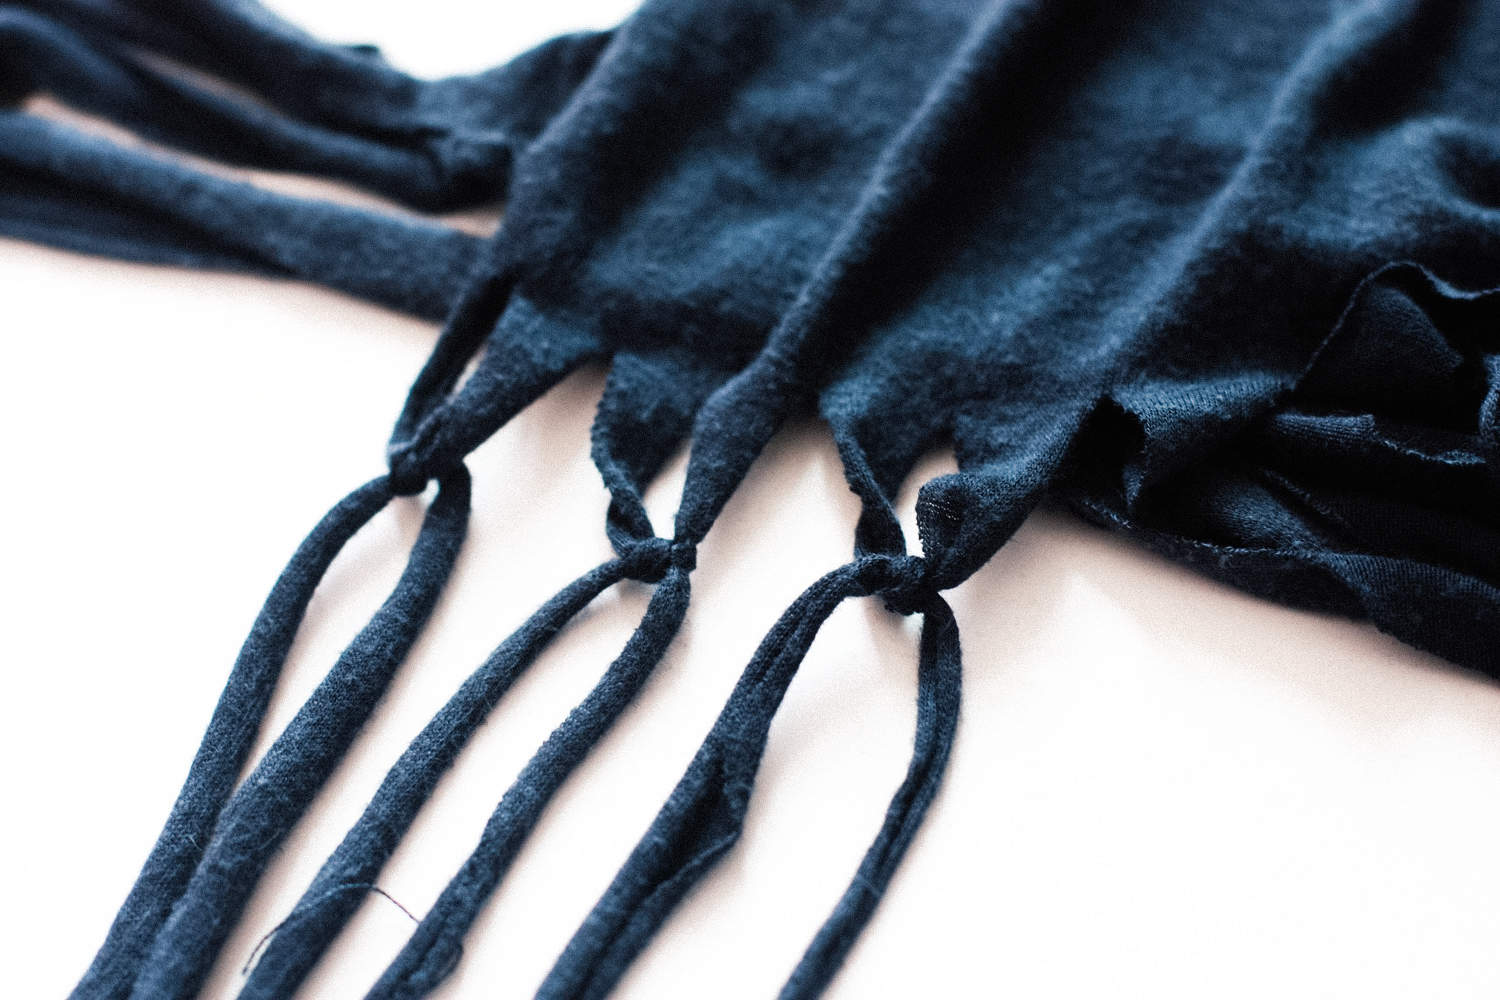
2. Cut your fringe pieces all around the bottom of the shirt, approximately 4” long (or longer- if you like a cropped shirt!). When done, pull on your fringe to make sure they are super thin & flowy.
3. Knot together two pieces of fringe, & repeat the knot on every two pieces
4. Once you’re done knotting your fringe on the first row, repeat the process knotting together the next row. Tie together 1 piece of fringe from the first knot to another piece of fringe from the second knot- making a macramé type pattern. I repeated this three times, but you can do as many rows as you would like.
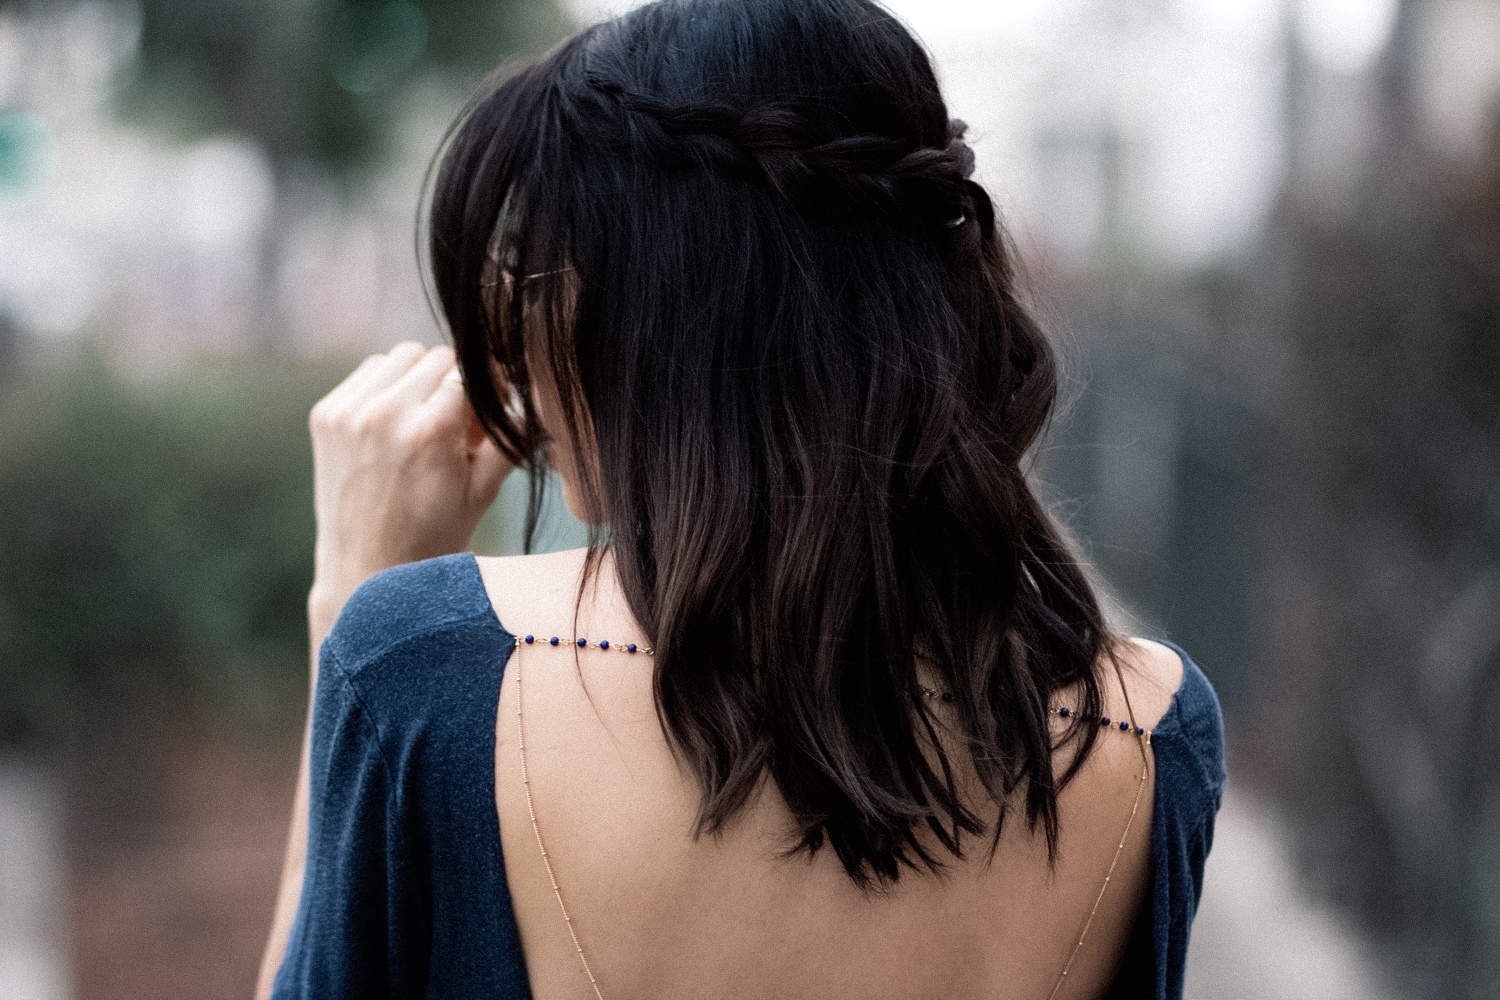
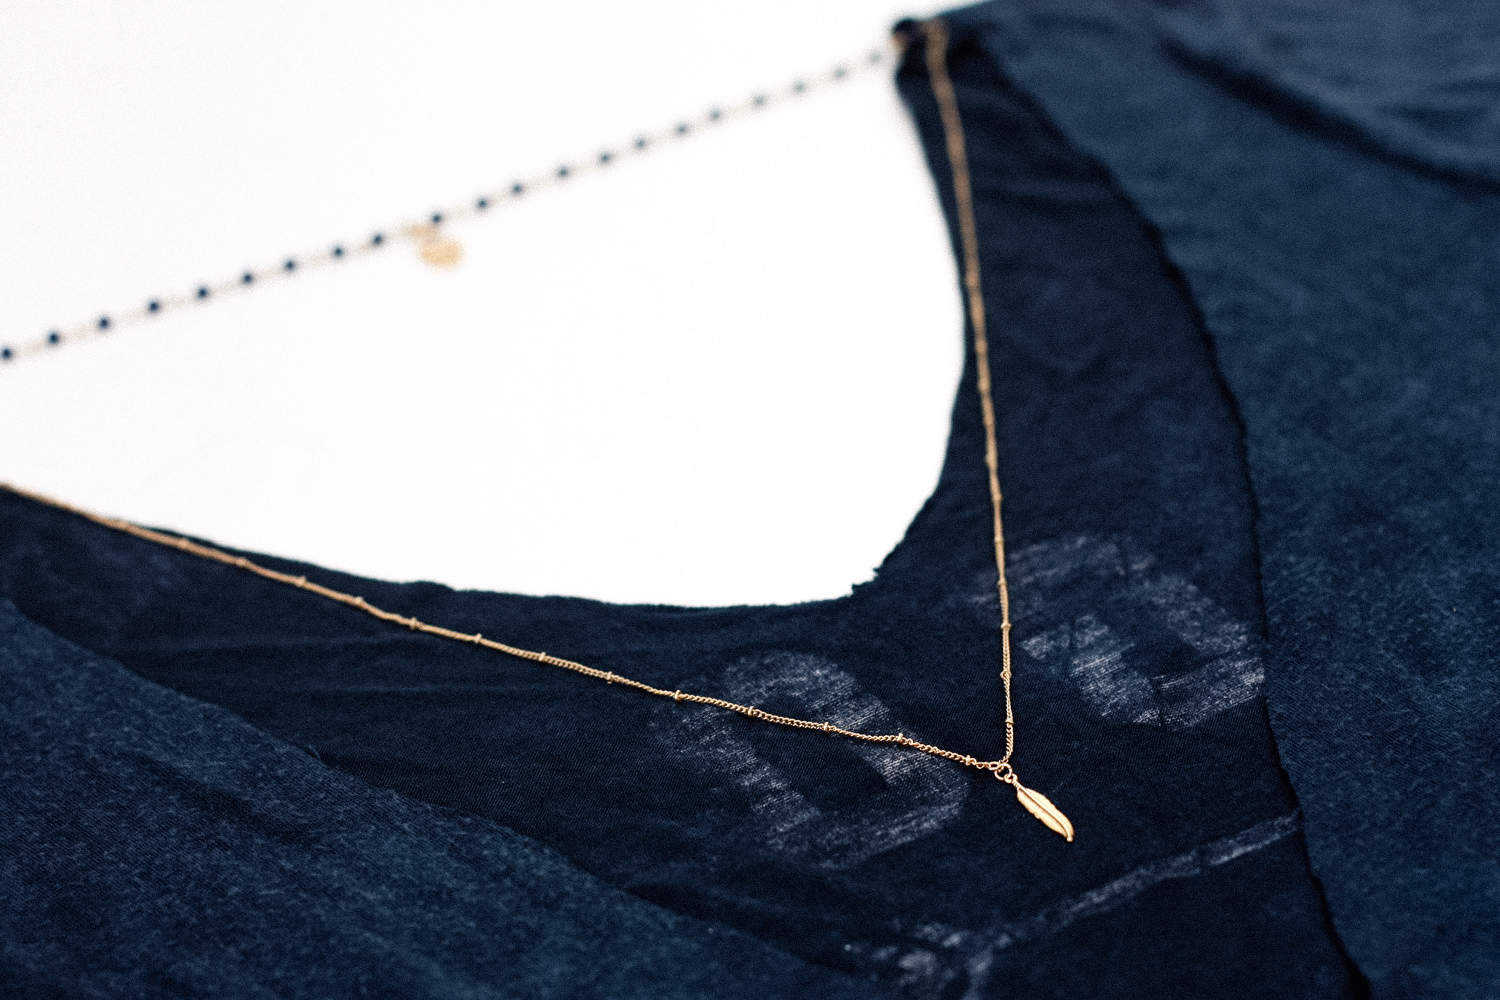
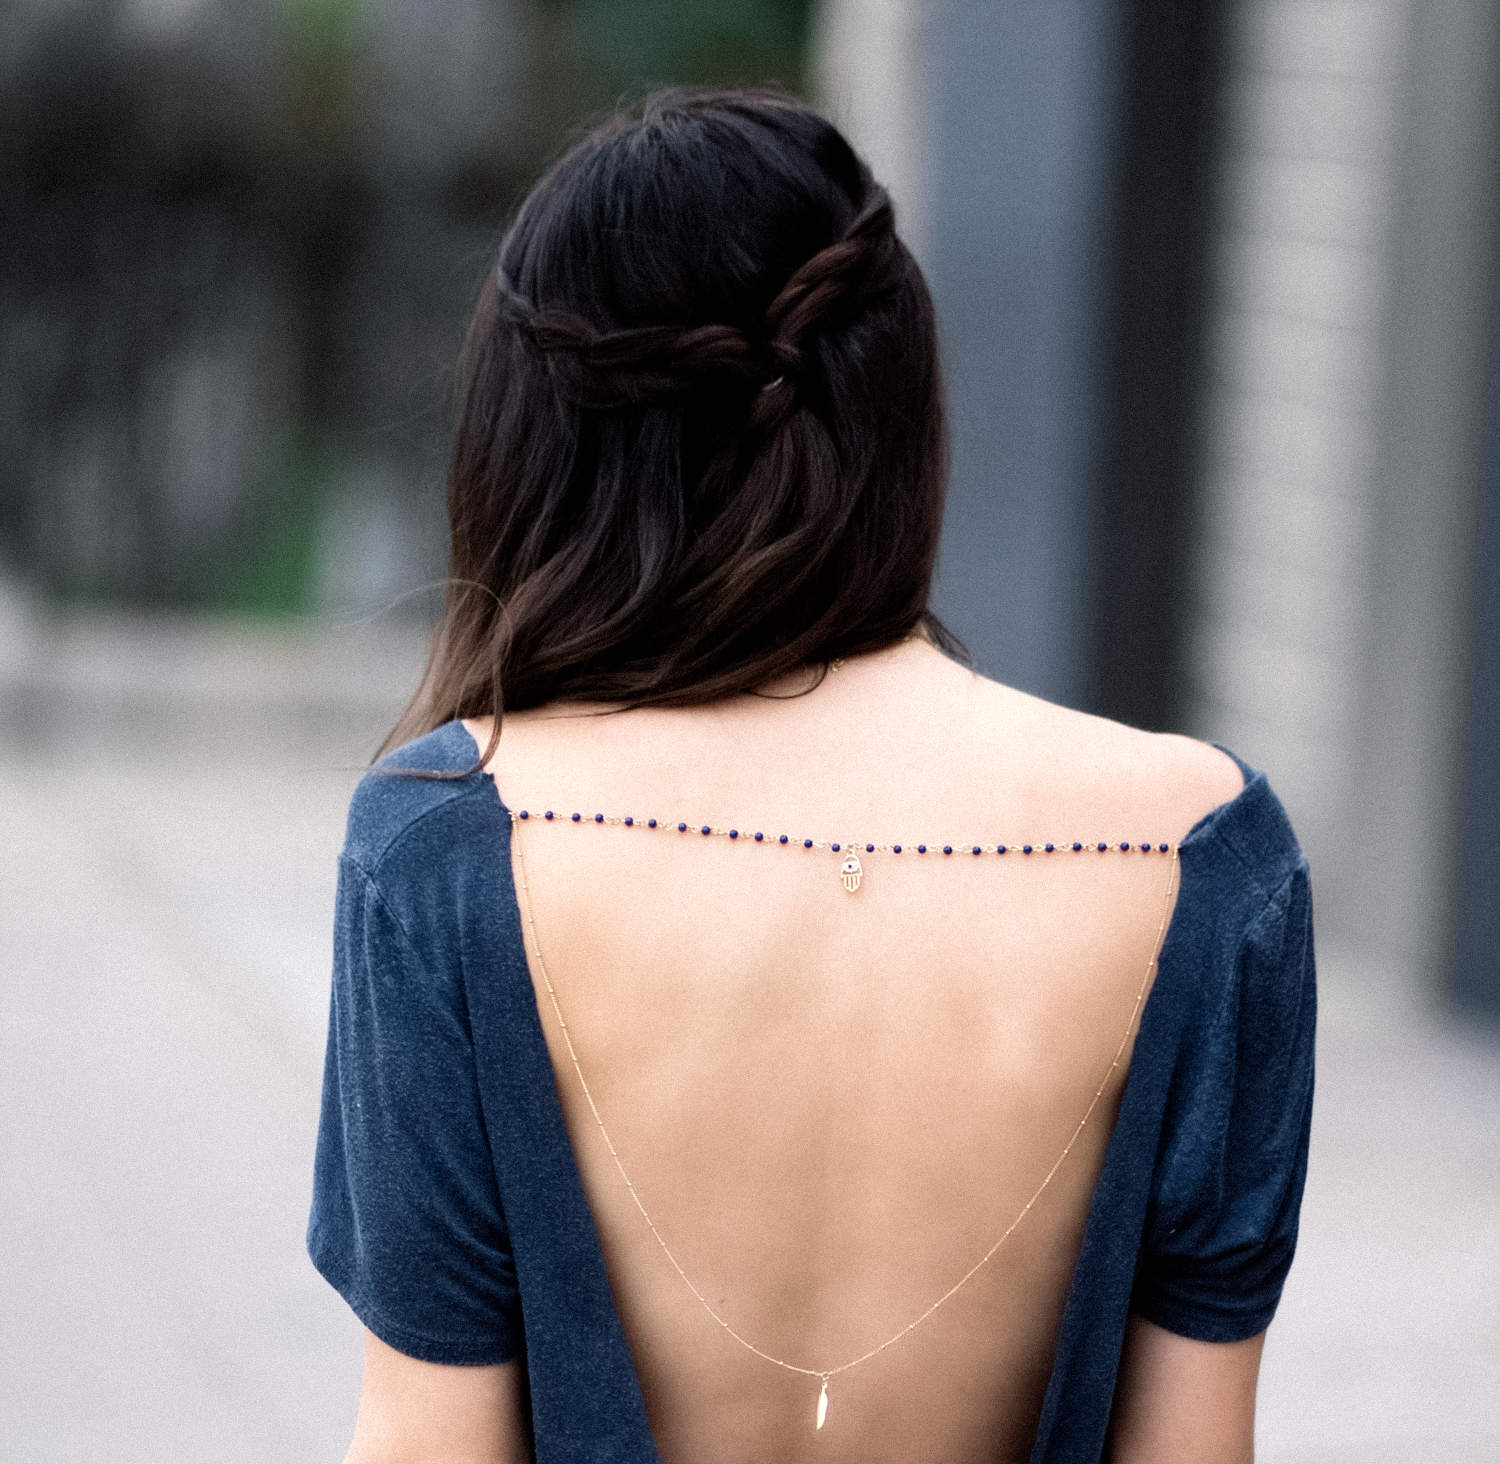
5. Cut the neck off of your shirt, going lower on the back to give it a backless vibe.
6. Remove the clasps from your necklace & sew the necklace onto your t-shirt from shoulder to shoulder. My necklace was a layered necklace- so I let the gold chain hang down the back & added a feather charm for a little extra flair!
I adore this! I’m loving doing festival DIYs for Coachella but have stuck with accessories thus far. I might just have to branch out and give this shirt a try. Thanks for sharing!
Yea! It’s a fun one <3
I am with you! No festivals for this girl! I love the idea of the necklaces in the back though so CUTE xo C
Ugh- they sound horrible!! x
I love that. It seems easy to be done. I love the lace in the back, over your shoulder… Really nice.
Thanks!
Where are those necklaces from tho? <3
Charlotte Russe :)